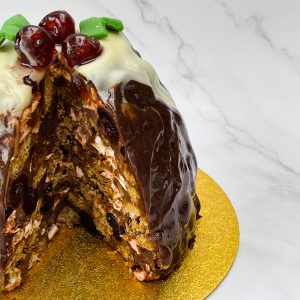
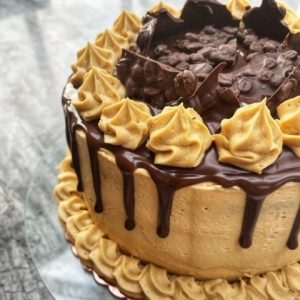
Baileys Chocolate Cake

Baileys Chocolate Cake

INGREDIENTS

CHOCOLATE CAKE
• 250g unsalted butter
• 250g light brown sugar
• 250g dark chocolate, melted then cooled
• 4 large eggs
• 350g self-raising flour
• 150g soured cream
• 150ml Baileys

 ICING
• 100g white chocolate melted
• 500g unsalted butter
• 500g icing sugar
• 45ml Baileys

METHOD

  1. Grease and line 3 x 20cm round springform cake tins and preheat the oven to 160 degrees fan.
  2. Beat together your unsalted butter and sugar until light and fluffy. Add in the eggs and beat until combined.
  3. Add the Baileys, dark chocolate and soured cream and beat again until fully combined
  4. Add flour, beat again until smooth.
  5. Divide equally between the three tins and smooth across
  6. Bake both cakes on the middle shelf for 20 minutes or until a skewer comes out clean.
  7. Remove from oven, leave in the tin for 10 minutes then transfer to a wire rack to cool completely.
  8. To make the buttercream, beat the butter until pale and fluffy, then add the icing sugar, white chocolate and Baileys and beat again until soft and creamy.

To Assemble

  1. Start with one layer of the chocolate cake on to a cake board or plate, put a generous layer of buttercream across the top, then put another chocolate cake layer on and repeat the process.
  2. Pipe or spread the remaining buttercream on to the top of the cake.

ENJOY! If you opt for Baileys Chocolate Cake, please do share a picture!


Lemon & White Chocolate Yule Log

Lemon & White Chocolate Yule Log

INGREDIENTS
Cake
• 85g caster sugar
• 3 eggs
• 100g plain flour
• zest of 1 lemon
• 1 tsp baking powder

Filling
• 80g butter
• 150g icing sugar
• 250g mascarpone
• 6 tbsp lemon curd

Icing decoration
• 200g white chocolate, melted and cooled
• 250g butter
• 250g icing sugar

METHOD
• Grease a silicone Swiss roll tray (this is the one https://www.amazon.co.uk/Pieces-Silicone-Reusable-Biscuits-Macarons/dp/B098RR2Z4X/ref=mp_s_a_1_6?crid=1FV146YQ0LHY3&keywords=silicone+swiss+roll+baking+tray&qid=1639314830&sprefix=silicone+swiss+%2Caps%2C107&sr=8-6 I use, it’s worth it’s weight in gold for making these, it’s significantly easier than using a greased tray). Alternatively grease and line a baking tray. Preheat the oven to 180 degrees fan
• Using a stand mixer or electric hand mixer beat the eggs and sugar until they are pale, thick and creamy (around 6-7 minutes)
• Fold in the lemon zest, flour and baking powder.
• Pour into lined tray, spread evenly and cook for 10 mins. If you are using the silicone tray for easy I pop on top of an ordinary tray to bake, this makes it easier to remove from the oven.
• Remove from the oven, run a knife around the edges and leave to cool on a wire rack for 5 minutes. (If using the silicone tray leave to cool completely in there, no need to turn out).
• Turn out on to baking paper to cool completely if using an ordinary baking tray.
• To make the filling, beat the butter and icing sugar until smooth and creamy, then add the mascarpone and beat again
• To make the icing for decoration, add butter, melted and cooled white chocolate and icing sugar to a bowl and beat until smooth and creamy

To Assemble
• Dust a surface with icing sugar and pop on the cooled cake onto it. Using a palette knife, smooth mascarpone mixture all over the surface, followed by the lemon curd.
• Roll the cake up length ways (so the longest side is facing you), then at an angle chop a piece or the end off, which you can then place in the middle to look more like a log.
• Cover the entire outside in the white chocolate butter icing and then use a fork to make imprints similar to wood. Dust with a little icing sugar.

ENJOY! If you opt for lemon & white chocolate Yule log, please do share a picture!


Christmas Pudding Tiffin

Christmas Pudding Tiffin

INGREDIENTS
Tiffin
• 225g hobnobs
• 225g milk chocolate
• 150g dark chocolate
• 150g unsalted butter
• 160g golden syrup
• 25g glace ginger
• 100g Italian mixed peel
• 125g marshmallows (mini or large chopped up)
• 200g glace cherries

Decoration and ganache
• 75g dark chocolate
• 75g milk chocolate
• 150ml double cream
• 100g white chocolate melted
• Royal icing holly leaves

METHOD
• Use cling film to line a 1.2 litre pudding bowl, leaving extra cling film hanging over the sides.
• Crush the biscuits into pieces, you can just crush with your hands or use a rolling pin
• Melt the chocolate, butter and golden syrup in saucepan over a low heat and stir occasionally.
• In a separate bowl add the crushed biscuits, glace ginger, Italian mixed peel, marshmallows and glace cherries (reserve three for decoration) and stir to combine
• Remove the saucepan from the heat once all melted and pour over the biscuit mixture and stir thoroughly to combine.
• Spoon the mixture into the lined bowl, pushing down firmly to minimise air pockets. Leave to cool, then pop in the fridge to set overnight
• The following day, turn upside down on to a wire rack that has a piece of baking parchment underneath it.
• Make the chocolate ganache, combine the dark and milk chocolate with the cream and heat on 30 second bursts in the microwave, stir thoroughly between each burst until a smooth ganache is produced
• Pour the ganache over the top of the pudding and using a palette knife ensure it is all covered. Set in the fridge for 10 minutes to firm a little
• Melt the white chocolate in the microwave, this will take around 45 seconds.
• Remove the pudding from the fridge, spoon the white chocolate on to the top and let drip down, pop the remaining 3 cherries on the top. You can add royal icing holly leaves to decorate too.

ENJOY! If you opt for Christmas Pudding Tiffin, please do share a picture!


Christmas Spiced Cupcakes

Christmas Spiced Cupcakes

INGREDIENTS
Cupcakes
• 200g unsalted butter
• 150g light muscovado sugar
• 50g golden caster sugar
• 200g plain flour
• 2 tsp baking powder
• ½ tsp vanilla extract
• 1 tsp ground ginger
• ½ tsp ground cinnamon
• ¼ tsp ground nutmeg
• 3 eggs

Icing
• 200g unsalted butter
• 50g light muscovado sugar
• 3 tbsp double cream
• 400g icing sugar
• Large pinch of cinnamon

Optional for decoration – decorative orange chocolate pieces

METHOD
1. Line a muffin tin with 12 cupcake cases and preheat the oven to 175 degrees fan.
2. Beat together your unsalted butter and sugars until light and fluffy. Add in the eggs and vanilla extract and beat until combined.
3. Add flour, baking powder, ground ginger, cinnamon, nutmeg until smooth.
4. Spoon equal amounts into each cupcake case and bake for 18 minutes.
5. Remove from oven, leave in the tin for 10 minutes then transfer to a wire rack to cool completely.
6. To make the buttercream, beat the butter until pale and fluffy, then add the icing sugar, muscovado sugar, double cream and cinnamon and beat again until soft and creamy.
7. Either pipe or spoon onto the cooled cupcakes
8. Optional: scatter orange chocolate pieces


ENJOY! If you opt for Christmas Spiced Cupcakes, please do share a picture!


Chocolate & orange candle cookie cake with cookie pops

Chocolate & orange candle cookie cake with cookie pops

INGREDIENTS
COOKIE CAKE
• 550g plain flour
• 2 tsp bicarbonate of soda
• 2 tbsp cornflour
• 240g unsalted butter
• 100g granulated sugar
• 290g light brown sugar
• 2 large eggs
• 200g white chocolate chips
• 280g chocolate orange bars broken into chips
• Zest of an orange
• ¾ tsp cinnamon

BUTTERCREAM
• 500g unsalted butter
• 750g icing sugar
• 1 tbsp juice from an orange
• 250g white chocolate, melted

GANACHE
• 75g white chocolate
• 25ml double cream

Optional for decoration
– One tealight holder and tealight candle.
– 150g white royal icing and snowflake cutter
– A few edible pearls

METHOD

  1. Line a 4 x 12cm spring form cake tins and 1 x 6-inch cake tin and preheat the oven to 170 degrees fan.
  2. In a bowl combine the flour, bicarb, salt, and cornflour together to ensure it is all evenly distributed
  3. Either using a hand or stand mixer beat together your unsalted butter and sugars until light and fluffy. Add in the eggs and beat until combined
  4. Add in the flour mix, white chocolate chips and chocolate orange chips and beat until a thick dough is formed.
  5. Press amounts of the cookie dough into the 12cm cake tins (about half full) and the remaining into the 6-inch cake tin.
  6. Bake in the oven for 20-25 minutes, the top of the cookies should look cooked and have no movement.
  7. Remove from oven, leave in the tin for 10 minutes then transfer to a wire rack to cool completely.
  8. To make the buttercream, beat the butter until pale and fluffy, then add the icing sugar, white chocolate and orange juice and beat again until soft and creamy.
  9. Make the ganache by combining the white chocolate and cream into a microwavable bowl and heat for 30 seconds, stir well until smooth and glossy, if needed pop back in for a further 10 seconds and stir again.

To Assemble

  1. Begin with the cookie pops. Break the 6-inch cookie in a large bowl into small pieces. Add sufficient of the buttercream to bring together into a “dough” that can be moulded into balls, do this by adding a heaped tbsp at a time and keep stirring through with a spatula.
  2. Make different sized ball cookie pops, pop on to a plate and refrigerate whilst you prepare the rest of the cake.
  3. Start with one of the 12cm cookie cakes and place on to a cake board or plate, put a thin layer of buttercream across the top, then put the next cookie cake on and repeat the process. When you get to the top layer scoop out, using a spoon a hole large enough to hold your tealight holder and tealight. (Skip this step if you do not want to use the candle)
  4. Using a small amount of buttercream create a thin layer of icing covering the entire cookie cake (the crumb coat), pop in the fridge for 30 mins to harden.
  5. Remove from the fridge and cover in a full layer of buttercream. Smooth off using a cake scraper. (Reserve a little buttercream if you are decorating with the icing snowflakes)
  6. Using a piping bag with a small hole or a spoon, pipe the ganache around the top of the cake, allowing to drip over the edges, then across the top of the cake, avoiding the hole you have created to hole the candle. Pop in the fridge for 30 mins to set.
  7. With the remaining ganache, remove the cookie pops from the fridge and cover fully in ganache and put back in the fridge to set.
  8. If opting to make the snowflake decorations, roll out the royal icing and cut approximately 8 snowflakes (depending on the size of your cutter this could be slightly more or less)
  9. Once set add the cookie pops around the base of the candle cake and stick on the snowflakes around the candle. Decorate with the edible pearls.
  10. Add the tealight holder and candle on to the top of the cake – your cookie cake candle table centrepiece is created!

ENJOY! If you opt for Chocolate & orange candle cookie cake with cookie pops , please do share a picture!


Halloween Spooky Spider Cookies & Cream Pie

Halloween Spooky Spider Cookies & Cream Pie

INGREDIENTS

PIE BASE
• 75g unsalted butter
• 350g Oreos

COOKIES & CREAM FILLING
• 1 can condensed milk
• 300ml double cream
• 250g mascarpone
• 300g cookies and cream spread

CHOCOLATE TOPPING
• 300g milk chocolate melted
• 100g white chocolate melted
• 1/2 tsp vegetable oil

METHOD

  1. Grease a large, deep flan or tart tin.
  2. First make the base. Blend the biscuits to fine crumbs using a food processor. Melt the butter and then mix in to the crumbs.
  3. Press the biscuits into the base and up the sides of the tin to make a pie case. Place in the fridge for 5-10 minutes whilst you make the filling.
  4. Using a hand or stand mixer (the whisk attachment), combine the mascarpone, cream, condensed milk and cookies and cream spread. Whisk until thick.
  5. Remove the base from the fridge and spoon on top of the Oreos, even the top with a palette knife or the back of the spoon and put back in to the fridge.
  6. Melt the milk chocolate in the microwave in 30 second bursts, stirring between each one. Once fully melted add the oil and stir thoroughly to combine. Melt the white chocolate in a separate bowl.
  7. Remove the pie from the fridge and pour on the melted milk chocolate and oil mixture until it is all covered.
  8. Either pipe or drizzle off a spoon, circles of white chocolate on to the milk chocolate.
  9. Use a cocktail stick or skewer, start at the centre of the cake, drag the stick straight out to the edges to make a spider’s web.  Chill for an hour or until you are ready to serve.


ENJOY! If you opt for Halloween Spooky Spider Cookies & Cream Pie, please do share a picture!


Lemon & Chocolate Layer Cake

Lemon & Chocolate Layer Cake

INGREDIENTS

CHOCOLATE CAKE
• 250g unsalted butter
• 250g light brown sugar
• 4 large eggs
• 200g self-raising flour
• 50g cocoa powder

WHITE CHOCOLATE & LEMON CAKE
• 250g unsalted butter
• 250g golden caster sugar
• 4 large eggs
• 100g white chocolate melted and cooled
• Juice and zest of 1 lemon
• 250g self-raising flour

BUTTER ICING
• 300g white chocolate melted
• 500g unsalted butter
• 1000g icing sugar
• Juice of half a lemon

GANACHE
• 150g white chocolate
• 50ml double cream
• Yellow food colouring

OPTIONAL DECORATIONS:
• Handful of white chocolate and milk chocolate chips
• Lemon peel

METHOD

  1. Grease and line 2 x 8inch deep round springform cake tins and preheat the oven to 170 degrees fan.
  2. First make the chocolate cake. Beat together your unsalted butter and sugar until light and fluffy. Add in the eggs and beat until combined.
  3. Add flour and cocoa powder, beat again until smooth.
  4. Pop to one side whilst you make the second cake.
  5. To make the white chocolate and lemon cake. Beat together your unsalted butter and sugar until light and fluffy. Add in the eggs and beat until combined. Then add the white chocolate, lemon zest and juice, beat again.
  6. Add flour, beat again until smooth.
  7. Spoon into the other lined cake tin.
  8. Bake both cakes on the middle shelf for 50-60 minutes or until a skewer comes out clean.
  9. Remove from oven, leave in the tin for 10 minutes then transfer to a wire rack to cool completely. Once the cakes are completely cool level off the tops then slice each cake in to two, creating four layers in total.
  10. To make the buttercream, beat the butter until pale and fluffy, then add the icing sugar, white chocolate and lemon juice and beat again until soft and creamy.
  11. Make the ganache by combining the white chocolate and cream into a microwavable bowl and heat for 30 seconds, stir well until smooth and glossy, if needed pop back in for a further 10 seconds and stir again. Then add in 2-3 drops of food colouring and stir until completely mixed.

To Assemble

  1. Start with one layer of the chocolate cake on to a cake board or plate, put a thin layer of buttercream across the top, then put a lemon and white chocolate cake layer on and repeat the process, alternating the cake type each time until you get to the top layer of lemon and white chocolate cake.
  2. Using a small amount of buttercream create a thin layer of icing covering the entire cake (the crumb coat), pop in the fridge for 30 mins to harden.
  3. Remove from the fridge and cover in a full layer of buttercream, reserving some to pipe on the top after the ganache. Smooth off using a cake scraper.
  4. Using a piping bag with a small hole or a spoon, pipe the ganache around the top of the cake, allowing to drip over the edges, then across the top of the cake. Pop in the fridge for 30 mins to set.
  5. Pipe the remaining buttercream around the top of the cake and decorate with chocolate chips and lemon peel.

ENJOY! If you opt for Lemon & Chocolate Layer Cake, please do share a picture!


Raspberry & White Chocolate Cake

Raspberry & White Chocolate Cake

INGREDIENTS

CAKES
• 400g unsalted butter
• 400g caster sugar
• 400g self-raising flour
• 8 medium eggs
• 300g raspberries
• 300g white chocolate, melted

BUTTER ICING
• 350g unsalted butter
• 700g icing sugar
• 300g white chocolate, melted

Optional to decorate – handful fresh raspberries & freeze dried raspberries

METHOD

  1. Grease and line 3 x 8inch round springform cake tins and preheat the oven to 180 degrees fan.
  2. Beat together your unsalted butter and sugar until light and fluffy. Add in the eggs and beat until combined. Then add the melted and cooled white chocolate and beat again.
  3. Add flour and beat again until smooth. Then fold in the raspberries to the cake mixture.
  4. Spoon equal amounts into each tin and bake for 30-35 minutes or until a skewer comes out clean.
  5. Remove from oven, leave in the tin for 10 minutes then transfer to a wire rack to cool completely. Once the cakes are completely cool I always level off the top of each one, it just makes it much easier to pipe and stack.
  6. To make the buttercream, beat the butter until pale and fluffy, then add the icing sugar and white chocolate and beat again until soft and creamy.
  7. Either pipe or spoon onto the first cake, add the second cake on top and repeat the process.

Optional: Once the top of the cake has been iced decorate with fresh raspberries and freeze dried raspberries

ENJOY! If you opt for Raspberry & White Chocolate Cake, please do share a picture!


Tiramisu Layer Cake

Tiramisu Layer Cake

Coffee, chocolate, mascarpone and a beautifully light Genoise sponge, could a combination get any better. This is a show stopper, looks incredible, tastes even better. It is light, moist and packed with flavour, a must bake!

INGREDIENTS

Genoise Sponge
50g unsalted butter
250g caster sugar
250g plain flour
pinch of salt
8 large eggs

Coffee Syrup
2 tbsp instant coffee powder
60ml caster sugar
60ml boiling water

Mascarpone Cream
400g mascarpone
100g icing sugar
100g double cream
1/2 tsp vanilla essence

Coffee Butter Cream
350g unsalted butter
50g mascarpone
500g icing sugar
50ml double cream
2 tsp coffee in 30ml boiling water

Dark Chocolate Ganache
75g milk chocolate
75g dark chocolate
150ml double cream

Dark Chocolate Ganache
25g coffee beans
100g dark chocolate

METHOD

Genoise Cake

1. Preheat your oven to 180 degrees fan and grease and line 8inch cake tins with either butter, or my personal recommendation (which never fails me), PME release a cake spray

2. Using a stand mixer or electric hand mixer, beat the sugar and eggs until the mixture has about trebled in size and is thicker and pale in colour, this will take around 7-9 minutes

3. Put the flour and salt into the bowl and fold in by hand using a wooden spoon, try to knock out as little air as possible. Add the melted butter and fold in until all combined

4. Divide the mixture between the two greased tins and bake in the oven for 25-30 mins. The cakes will be done when risen and a slight spring to the touch.

5. Remove from the oven and leave to cool in the tin for 10 minutes before turning out on to a wire rack to cool completely. When they are completely cooled cut each cake into two horizontally to create four layers.

Chocolate covered Coffee Beans

1. Preheat your oven to 220 degrees. Lay the coffee beans on a lined baking tray and roast in the oven for 3-4 minutes. Leave to cool.

2. Melt the dark chocolate in 30 second bursts in the microwave and then tip in the cooled roasted beans.

3. Line a plate with a piece of greaseproof paper and pour the chocolate bean combination on to it, spreading into a single layer.

4. Leave in the fridge to set, when it is set completely break up into shards with your hands.

Coffee Syrup

1. Combine all the ingredients in a cup and stir until dissolved, leave to one side until assembly is required.

Mascarpone Cream

1. In a stand mixed combine all the ingredients and beat until stiff peaks are formed, put to one side ready for assembly.

Coffee Butter Cream

1. In a stand mixed combine the butter and mascarpone, beat until pale and soft.

2. Add the icing sugar, coffee and double cream and beat again until smooth and creamy, leave to one side ready for assembly.

Dark Chocolate Ganache

1. Put the chocolates and cream into a microwavable bowl, heat at 30 second intervals stirring vigorously between each burst, do this twice (so 60 seconds in total). Keep stirring even when you think it won’t come together, it will and it will be a glossy, thick finish.

Assembly

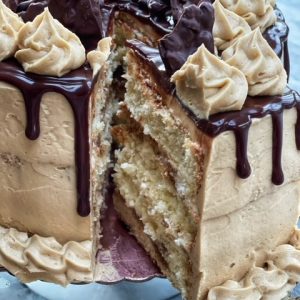
1. Pop the base layer of the Genoise sponge on a cake board, spoon over a quarter of the coffee syrup all over the top. Then top with a third of the mascarpone cream, repeat this process until you have popped the top layer on and only covered it in the coffee syrup (not the mascarpone).

2. Cover the top and sides of the cake in the coffee buttercream, using a scraper or pallet knife to smooth the sides. Reserving some for piping the base and top (this is optional). Then refrigerate for 10 minutes.

3. Remove from the fridge then using a spoon pour gently the dark chocolate ganache into the centre of the cake and gently tease over the edges to create drips. It doesn’t matter if they are uneven. Refrigerate for 10 minutes.

4. Pipe on to the top of the ganache some more buttercream if you wish and I pipe using the rope technique around the base, however both of these are optional.

5. Decorate with the shards of the chocolate covered coffee beans.


ENJOY! If you opt for Tiramisu Layer Cake, please do share a picture!